Tough clog in Epson R220

websnail

Printer VIP
Platinum Printer Member
Joined
Oct 27, 2005
Messages
3,666
Reaction score
1,349
Points
337
Location
South Yorks, UK
Printer Model
Epson, Canon, HP... A "few"
This product is also available from a Danish supplier, but p.t. not in stock. It is also available from other EU suppliers, so what are your experiences with the product, please?
I haven't had a chance to use it properly as yet so I can't say how effective it is but I suspect it'll come down more to technique than the actual solution so looks like I've got another bunch of lessons to learn all over again.
 

elerouxx

Getting Fingers Dirty
Joined
Jan 25, 2014
Messages
21
Reaction score
10
Points
22
Printer Model
R220
Well guys, I finally did it. I killed my printer!

After reinstalling the printhead on the printer, there was nothing but blank pages.

I removed it again, carefully cleaned and dried the circuit board in the printhead using a circuit-cleaner spray (mostly alcohol), reconnected the ribbon cable connections carefully (quite hard, I wish I had smaller fingers). I thought the connectors were the problem, but I'm pretty sure they are well connected. I'm also sure this is not a clog problem because there isn't a trace of ink on the paper even with full cartridges and after doing some of the cleaning procedures in this post.

So the problem is actually ME. I have ISSUES! LOL

I hate throwing away hardware, I want to fix everything, and I don't know when to stop. I could have kept the printer to print only in photo mode for a while but I wasn't satisfied with a clogged head so I decided to 'bet it all'. You were absolutely right, PeterBJ.

Sorry if I wasted my time and yours. I was warned and learned my lesson and I am publishing it here for others. Removing the printhead was unnecessary. Whatever you want to do with the printhead (i.e. even flushing any liquid thru the beaks) can be done with the printhead in place. Cleaning and drying the underlying printer parts afterwards is easier and safer than removing the head.

I'm researching some new printers now. I think my next printer/multifunctional will probably be an HP.
 

The Hat

Printer VIP
Platinum Printer Member
Joined
Jan 18, 2010
Messages
15,792
Reaction score
8,824
Points
453
Location
Residing in Wicklow Ireland
Printer Model
Canon/3D, CR-10, CR-10S, KP-3
Sorry to hear your dreadful news but I wouldn’t give up just yet, maybe there’s still hope for it.:barnie

I reckon you have not pushed home the Data cable (Ribbon) enough and it’s not making good electrical contact, try using a snub-nosed pliers instead of your fingers, it can’t hurt to have another go at it.
Let us know the outcome hopefully it will be good.. :woot
 

elerouxx

Getting Fingers Dirty
Joined
Jan 25, 2014
Messages
21
Reaction score
10
Points
22
Printer Model
R220
Thanks, The Hat.
I think connections are pretty tight and correctly positioned by now. I remade these connections carefully, and with a magnifier glass I can see the contacts on the ribbons are in contact with the metal contacts in the connectors.

The tip of the ribbon cables are very thin and soft. The cables have usually a piece of blue, harder plastic glued to the back of the connectors to make them more rigid and properly thick, but these plastic pieces felt appart when I disconnected the cables. I had to replace them with tabs of transparent plastic I cut from somewhere else. (image) I'm sure connection is well aligned, deep and tight.

2014-02-02 10.57.25.jpg
The little circuit board in the printhead is also clean and dry. I used a proper spray for circuits that doesn't left any residues. It evaporates quickly, much like isopropylic alcohol.

I think I was too aggressive with the printhead during the process. Maybe some of the cleaning solution liquid went INSIDE the printhead, not just the nozzles. Quite probably the printhead is just dead. But I'm letting it dry for some days, hoping it starts working. Very long shot.
 

Tudor

Print Addict
Platinum Printer Member
Joined
May 6, 2011
Messages
505
Reaction score
203
Points
183
Location
Cluj-Napoca, Romania
Printer Model
Epson L800, 1400; ML-2165W
In your image, the top connector has some transparent plastic on it, I think you are referring to it as "tab". If it covers the back and front of the wires... how would you get a contact?
There is a dot on the 6th wire... is the wire intact?
 

elerouxx

Getting Fingers Dirty
Joined
Jan 25, 2014
Messages
21
Reaction score
10
Points
22
Printer Model
R220
I wish you were right.

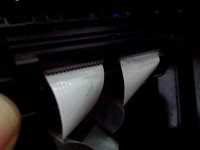
the ribbon cables have visible connectors on one side and a piece of rigid plastic glued to the other side (I had to replace the original blue plastic for this one I found, about the same thickness, because the former was 'rotten'.)

Obviously the plastic doesn't cover the contacts, which are in the opposite side.

The wires are intact but I'll double check them again in the morning.

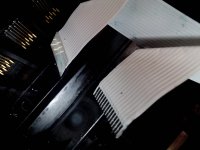
The picture above shows two ribbon cables facing opposite directions. The cable with the visible connections also has a piece of plastic on the other side.
 

elerouxx

Getting Fingers Dirty
Joined
Jan 25, 2014
Messages
21
Reaction score
10
Points
22
Printer Model
R220
It's hard to photograph, but I checked that the cables and connectors are in contact and are aligned, on both connectors. Also, the way the ribbon cables are folded and layed out on the printer, it's impossible to accidentally switch them or turn them around. The cables are not so fragile to be broken by the fold or turns, the indents you see along the cables are superficial and don't go near the copper inside.


2014-02-03 01.46.22.jpg
 

Tudor

Print Addict
Platinum Printer Member
Joined
May 6, 2011
Messages
505
Reaction score
203
Points
183
Location
Cluj-Napoca, Romania
Printer Model
Epson L800, 1400; ML-2165W
The way the ribbons are folded doesn't seem to correspond with the way they are inserted. Are you sure the left ribbon should go to the left and not the right?
 

elerouxx

Getting Fingers Dirty
Joined
Jan 25, 2014
Messages
21
Reaction score
10
Points
22
Printer Model
R220
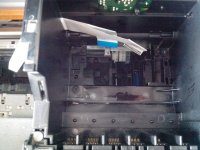
Yes. There's only one way to connect the printhead. You can pull out a little more of the cables and unfold them to help making your work easier, but there's only one way all this can be put back together. Here's an image of when I first removed the printhead, it shows the original position of the cables, one longer than the other, one facing down, the other facing up.

2014-02-01 15.38.25.jpg
 

turbguy

Printer Master
Platinum Printer Member
Joined
Sep 10, 2007
Messages
1,562
Reaction score
1,440
Points
293
Location
Laramie, Wyoming
Printer Model
Canon i960, Canon i9900
If you have allowed air to enter the print head ink passageways, it may take a LOT of effort to "prime" the nozzles. I beleive the Epson recommends a maximum number of serial/repetitive cleaning cycles without a specific cool-down period. Did you perform repetitive cleaning cycles after installing the head?
 
Top