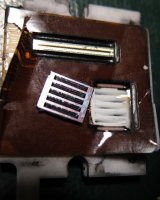
Re-glue ceramic part to print head

Tandberg

Getting Fingers Dirty
Joined
Jan 13, 2013
Messages
23
Reaction score
11
Points
39
Location
Sweden
Printer Model
Pixma Pro 9500 Mk II
@Smile

No CNC unfortunately, my mashines are more of the kind tool- and watch-makers use.
Hand-cranked but very good precision if you have the patience and the equipment to do
accurate measurements along the process. I used to design and build equipment used
in research institutions and in my projects now the prototype and the final product are the
same thing so CNC is overkill. Also I'm semi-retired so having fun has the highest priority.
I would be a really lousy subcontractor that suddenly could disappear on a whim.
 

Tandberg

Getting Fingers Dirty
Joined
Jan 13, 2013
Messages
23
Reaction score
11
Points
39
Location
Sweden
Printer Model
Pixma Pro 9500 Mk II
The left part in the picture shows plexiglass and a modified cap for PGI-9 cartridges glued
together with a cyanoacrylate that is used with a primer to stick to "hard-to-glue" materials.
The plastic stuff in the cap is unkown, no markings of what type it is. I tested a few other
glues on small pieces first but they all were easy to pull apart.

A link to a list of abbreviations used for plastic parts, often printed on the part.
Finding a glue is easier if you know what the parts are made of.
http://www.matweb.com/reference/abbreviations.aspx


[Click to enlarge]

The right part of the picture is the "filling station" with the removable tank/gasket.
Some glued parts use UV-curing cyanoacrylate, it's a dream to use compared to the one above.
You have unlimited time to do adjustments and remove excess glue. Put it in sunlight or under
a UV-lamp and it sets in seconds.

The key part is a linear rail guide that gives a parallell up-down movement of the tank/gasket.
The rest is just mechanical support. Sorry, I could not resist polishing the parts. Sometimes
I bring hardware to a local photo club to get the discussions going, you get points for "bling-factor".
 

PeterBJ

Printer VIP
Platinum Printer Member
Joined
Nov 27, 2010
Messages
5,124
Reaction score
5,001
Points
373
Location
Copenhagen Denmark
Printer Model
Canon MP990
I'm impressed. Your design certainly has the "bling-factor" :thumbsup
 

The Hat

Printer VIP
Platinum Printer Member
Joined
Jan 18, 2010
Messages
15,849
Reaction score
8,871
Points
453
Location
Residing in Wicklow Ireland
Printer Model
Canon/3D, CR-10, CR-10S, KP-3
Tandberg said:
I could not resist polishing the parts. Sometimes
I bring hardware to a local photo club to get the discussions going, you get points for "bling-factor".
Your refill gadget looks the business and is certainly eye catching but I am curious as to how well it works,
you havent mentioned using it for real yet. (Less Bling, more dirt)

I dont really care if my refiller looks like the back end of a bus and it probably does,
just so long as it works and wont break the first time I use it,
Ive had a lot of colourful failures already and more to come I suspect..
 

Smile

Printer Master
Joined
Aug 23, 2006
Messages
1,956
Reaction score
433
Points
253
Location
Europe EU
Printer Model
Canon, Brother, HP, Ricoh etc.
Tandberg said:
Finding a glue is easier if you know what the parts are made of.
The parts are made from well, silicone for the gasket and from ceramic for the head. But if you remove the half of the ceramic you can clearly see the silicone is adhered to the ceramic, but when removed there is no glue. It's mystery to me. What glue glues yet leaves not residue?
 

martin0reg

Printer Master
Joined
May 9, 2010
Messages
1,060
Reaction score
748
Points
273
Location
Germany Ruhrgebiet
Old thread - but I have the same problem. And want to try the same cure.

I have "bought" two ip3000 in very good condition, almost for nothing... to try out the upcoming canon bottle ink, which is only CMY. (..being printer addicted..?..I have to confess..)
One was rarely used, the other stood idle in the last years, both have a "total page count" of less than 500 pages
Now both printheads are working after some cleaning, no stripes in the nozzle check, the nozzles seem to be fine.

BUT both printers (from different sellers and different usage), have the same issue:
"cross contamination", Magenta is mixing in the Yellow channel. After printing some purge patterns it disappears, but after some hours of idle time t will be there again...
The purge pad / cleaning unit of both is working fine, after dripping a puddle onto the pad it will be drained by the purge pump.

So I think it could be this gasket inside the printhead. And I wonder what to do...
- at the side of the printhead plastic body this gasket sticks onto the small holes, no glue is needed there
- the other side is the flat ceramic plate, and I am not sure how the sealing of the gasket originally works: must it be glued or is it enough to be pressed onto that plate, after you mount the plate with the screws?

I have just cleaned and dried and remount a gasket (of one of the two ip3000) without any gluing ... same ink mixing of M in Y as before.
And I have indeed glued another gasket, of a defective "training" printhead, with fast gluing cyanoacrylate. That was only a trial, the gasket is sticking very tight, I had to really tear it off after one day. But I am not sure if the strong glue means also a effective sealing...?...

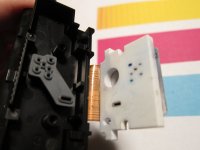
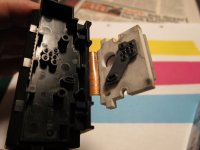
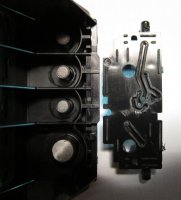
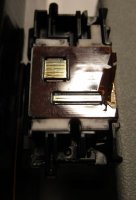
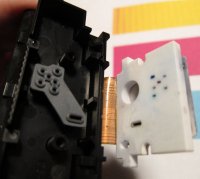
qy6--0049_dismantled-gasket.jpg qy6--0049_glued-gasket.jpg

PS: Any other ideas? Or other reasons for ink mixing in the wrong channel?
BTW the magenta have not reached the yellow cartridge yet, cantamination is only in the print by now...
(you can see the contaminated yellow test pattern in the background of the first image)

PPS: here is another thread:
http://www.printerknowledge.com/threads/canon-cart-cross-color-contamination-a-new-explanation.3142/
.. so loc-tite didn't made it..

@Smile: what is your opinion, what did you do back in 2013, glue the gasket or buy another head?
 
Last edited:

turbguy

Printer Master
Platinum Printer Member
Joined
Sep 10, 2007
Messages
1,562
Reaction score
1,442
Points
293
Location
Laramie, Wyoming
Printer Model
Canon i960, Canon i9900
An alternative leak path (and IMO a more probable one) is between the ceramic plate and the LSI wafer that contains the nozzles and support elecronics.
 

The Hat

Printer VIP
Platinum Printer Member
Joined
Jan 18, 2010
Messages
15,849
Reaction score
8,871
Points
453
Location
Residing in Wicklow Ireland
Printer Model
Canon/3D, CR-10, CR-10S, KP-3
@martin0reg, you have gotten two very good printers and have gone off half cocked in the excitement, and you should have waited and tried some more nozzles checks and test prints before taking the heads a part, that’s usually the very last step when all else fails.

Don’t use any glue or adhesive and reassemble the heads back as they were and hope you haven’t done any damage to them, the glue can cause even more problems and failure when the heads are powered on and printing.

The cross contamination that you have experienced is very little and would disappear after one or two test prints, it’s more lightly that one or more of the cartridges are leaking or the rubber seals are flatten from prolonged inactivity, IMHO..
 

martin0reg

Printer Master
Joined
May 9, 2010
Messages
1,060
Reaction score
748
Points
273
Location
Germany Ruhrgebiet
TheHat, the orange end of the yellow bar (seen on the first image above) seems to be little... but this was after several purging prints. The contamination has become even worse: after only an hour idle half the yellow bar is orange to purple.

So these printheads both are unuseable...
..and I took the risk and glued the second one..
Result: a strong glued gasket ... BUT also a broken ribbon cable which caused a short after putting the head into the printer...
Shit happens, now I have one glued gasket in a defective head, and most probably in a defective printer, because the damaged head certainly has damaged the printer board.
And one which I already took apart and reassembled without glueing, only cleaning. Without further damage - but at the same time without any success regarding cross contamination.

While I got these two pixma's for exactly 15€ and one is still okay I will buy me a new printhead. Which are yet available for 60-70€ (for other models like 4000 or 4500 these are out of stock)

Turbguy, good idea to suspect the connection of ceramic plate and nozzle plate.
And I would like to examine how the color channels are isolated on this very last step before firing the ink dots. But this bonding is hard to seperate. And not to repair I'm sure.
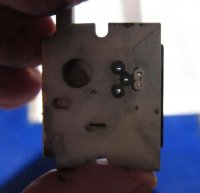
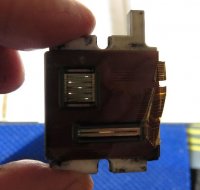
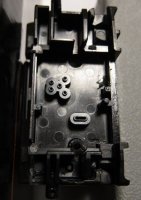
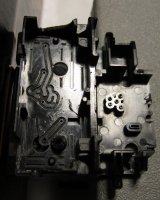
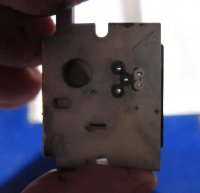
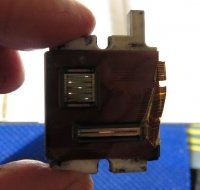
Here are both sides of this part (from the now destroyed head, with rests of the glued gasket), you can look through the 5 color channels from both sides. Sealing one nozzle row from the other must be a fiddly thing..
qy6-0064_ceramicnozzleplate-bk.jpg qy6-0064_ceramicnozzleplate-fr.jpg

(Note canon's method for light or "fine" colors: 3 cart inlets C-M-Y of the ip3000 result in 5 nozzle rows C-LC-M-LM-Y)
 

martin0reg

Printer Master
Joined
May 9, 2010
Messages
1,060
Reaction score
748
Points
273
Location
Germany Ruhrgebiet
After disecting (reads: distroying) the rest of the parts which are conducting the ink, here are some more images:

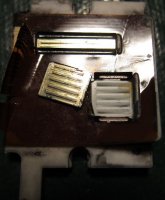
qy6-0064_1d_body-inlettogasketoutlet.JPG qy6-0064_1aa_body-inlettogasketoutlet.JPG qy6-0064_1b_body-inlettogasketoutlet.JPG qy6-0064_1c_body-inlettogasketoutlet.JPG qy6--0049_2_dismantled-gasket.jpg qy6-0064_2b_ceramicnozzleplate-bk.jpg qy6-0064_2c_ceramicnozzleplate-fr.jpg qy6-0064_3aa_nozzleplateonceramic0100.JPG qy6-0064_3c_nozzleplateonceramic0103.JPG

Now what might be the most "probable leak path"...?
After discovering the nozzle plate sitting directly on the cut-out ceramic plate,
I think it's the contact of the gasket on the "back" of the ceramic. But this is just speculation..

BTW: Happy New Year! ..must have missed the last glass of champagne..
 
Top