- Joined
- Jan 18, 2010
- Messages
- 15,915
- Reaction score
- 8,921
- Points
- 453
- Location
- Residing in Wicklow Ireland
- Printer Model
- Canon/3D, CR-10, CR-10S, KP-3
Ok, the hot-end on my CR-10 was constantly getting clogged up and blocking every 15 minutes or so, I didn’t have a clue till @Nija mentioned that if you exceed a certain temperature in the head the Teflon lining can get damaged and can cause the filament to become trapped.
I went about pulling everything apart, but I couldn’t get the throat, (it’s also called a heat brake) separated from the heat block and it snapped, with half still stuck in the heat block, when I examined the throat later the Teflon lining was crumpled and blackened, and I reckoned that was the cause of my problem.
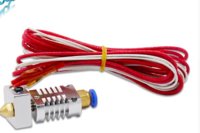
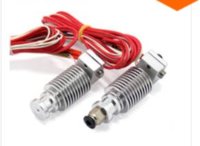
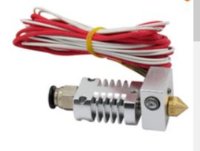
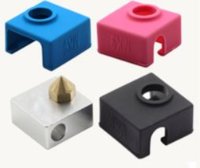
I purchased two new hot-ends form AliExpress along with a few other pieces like three new point 4 brass nozzles, several extra heat brakes (throats) , which were the wrong type, but I’ll get the right one’s next time, I wanted the heat brake with the Teflon lining.
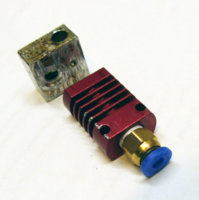
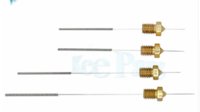
Here are the remains of my old hot-end, I salvaged the thermistor and cartridge heater out of the heat block, so I could use them in the new upgraded one, I also got some new needles.

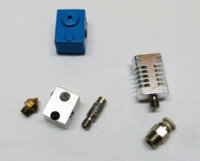
When you get a new Hot-end it usually comes in one piece, but you must separate all the parts before you can start to assemble them properly, this give you a chance to see all the bits and pieces up close.
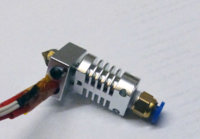
You start by screwing in the brass nozzle into the head block tight first, but back it off a quarter turn, then put in the thermistor and screw that in tight, but don’t crush the wire, follow that up with the cartridge heater, centre it in the heat block and tighten.
Next you can screw the throat into the heat block, but first it’s better to have a heat sealing paste on the threads to help it seat properly, and while you’re at it also helps to put a little paste on the head of the brass nozzle, I forgot to mention that earlier, sorry.
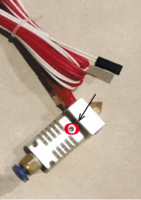
You can now tighten the brass nozzle into the heat block bot not to tight, because you may need to remove that if it ever becomes blocked, the last thing to add is the heat sink, you can tighten that down by hand but don’t forget to lock it in place with the tiny screw on the side.
The Pneumatic connector can be placed on the top and tightened by hand also, now all you got to do is attach it to the printer with the two screws that held on the old hot-end, and fix the cooling fans in place.
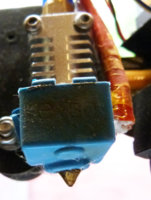
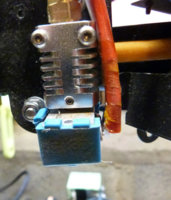
It’s best to heat the hot-end up to 190 c for a few minutes and then hand feed a piece of filament through the top and check that the filament is passing through the head and exiting the nozzle smoothly it should come out of the nozzles with a wiggle and then go straight, then pull out the test filament and in shove the PTFE feeding tube into the top and you’re ready to start printing...
My printer hasn’t stopped since...
I went about pulling everything apart, but I couldn’t get the throat, (it’s also called a heat brake) separated from the heat block and it snapped, with half still stuck in the heat block, when I examined the throat later the Teflon lining was crumpled and blackened, and I reckoned that was the cause of my problem.


I purchased two new hot-ends form AliExpress along with a few other pieces like three new point 4 brass nozzles, several extra heat brakes (throats) , which were the wrong type, but I’ll get the right one’s next time, I wanted the heat brake with the Teflon lining.
Here are the remains of my old hot-end, I salvaged the thermistor and cartridge heater out of the heat block, so I could use them in the new upgraded one, I also got some new needles.


When you get a new Hot-end it usually comes in one piece, but you must separate all the parts before you can start to assemble them properly, this give you a chance to see all the bits and pieces up close.


You start by screwing in the brass nozzle into the head block tight first, but back it off a quarter turn, then put in the thermistor and screw that in tight, but don’t crush the wire, follow that up with the cartridge heater, centre it in the heat block and tighten.
Next you can screw the throat into the heat block, but first it’s better to have a heat sealing paste on the threads to help it seat properly, and while you’re at it also helps to put a little paste on the head of the brass nozzle, I forgot to mention that earlier, sorry.
You can now tighten the brass nozzle into the heat block bot not to tight, because you may need to remove that if it ever becomes blocked, the last thing to add is the heat sink, you can tighten that down by hand but don’t forget to lock it in place with the tiny screw on the side.
The Pneumatic connector can be placed on the top and tightened by hand also, now all you got to do is attach it to the printer with the two screws that held on the old hot-end, and fix the cooling fans in place.


It’s best to heat the hot-end up to 190 c for a few minutes and then hand feed a piece of filament through the top and check that the filament is passing through the head and exiting the nozzle smoothly it should come out of the nozzles with a wiggle and then go straight, then pull out the test filament and in shove the PTFE feeding tube into the top and you’re ready to start printing...
My printer hasn’t stopped since...


