A basic guide (see post #1) to setting up ARGYLL CMS profiling on your computer

RogerB

Print Addict
Joined
Sep 27, 2010
Messages
293
Reaction score
316
Points
183
Location
S.E. England
Printer Model
Epson Pro3880
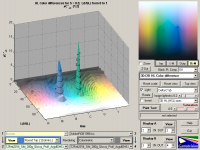
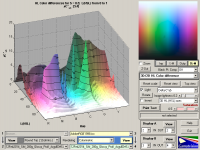
@RogerB I followed your advice and these two images display the misreading glitches, that show up as holes in the other display, very well. I have set the saturation to 33% roughly where they occur.
Yes - more helpful I think because it shows that the anomalies are primarily dark regions rather than "holes". Shows the usefulness of a tool like Gamutvision if you're messing around with profiles. A test print doesn't always show this kind of thing straight away.

in reply to rodbam and The Hat I would just say that messing with profiles from 9 to 5 can work up a very healthy thirst........
 

Emulator

Printer Master
Platinum Printer Member
Joined
Jan 4, 2012
Messages
1,675
Reaction score
1,308
Points
277
Location
UK
Printer Model
Canon Pro9000 II
@pharmacist,

I was equally puzzled by the difference between 660 and 750 patches profiles. Then it occurred to me that I had used 6 inks on the 750 and 8 inks (with the dodgy red) on the 660 patch re-read. So I have re-run the whole 660 patches profile using 6 inks.

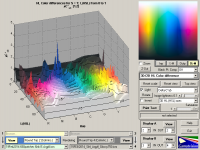
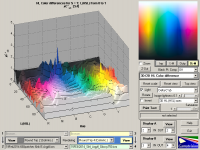
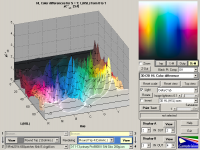
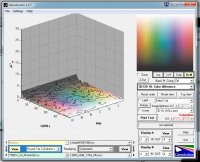
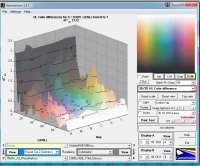
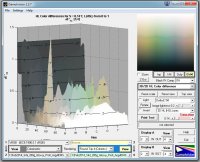
Here are the comparisons using Delta C*ab (colour errors) (As Delta E*ab but without the L brightness component) round trips in Relative Colorimetric Intent.

Note that the vertical scale is slightly different from the previous images, unfortunately I can't control it, but they are much closer in appearance, although I think the 750 still has it. Just for interest I have edited in one of my ColorMunki basic profiles without optimisation, on the right.

new660 round trip delta Cab.png750 round trip Delta Cab.png 3Nov13 primary 8inkIS ColorMunki.png

Out of curiosity, I have also created a 3 x A4 pages, 2250 patches 6 ink profile. The result seems to be inferior to the 750 patches.
 
Last edited:

pharmacist

Printer VIP
Platinum Printer Member
Joined
May 29, 2007
Messages
2,657
Reaction score
1,430
Points
313
Location
Ghent, Belgium
Printer Model
SC-900 ET-8550 WF-7840 TS705
For most printers 600 to 1000 patches is enough to create good profiles. So I think 750 is sufficient to get excellent profiles with neutral bw prints even on printers without gray inks.
 

PeterBJ

Printer VIP
Platinum Printer Member
Joined
Nov 27, 2010
Messages
5,119
Reaction score
4,987
Points
373
Location
Copenhagen Denmark
Printer Model
Canon MP990
Photoshop Elements is much more affordable than the full fledged Photoshop, does the Elements version also support printing with custom profiles? Tweaking printer driver settings and doing test prints is a very tedious trial and error process which cannot correct all errors, so this thread has made me wonder if I should also start profiling, so I have begun studying this topic.
 

Tudor

Print Addict
Platinum Printer Member
Joined
May 6, 2011
Messages
505
Reaction score
203
Points
183
Location
Cluj-Napoca, Romania
Printer Model
Epson L800, 1400; ML-2165W
Yes, Elements11 is able to use custom profiles: File - Print - MoreOptions - ColorManagement

I never used it, though.
 

Emulator

Printer Master
Platinum Printer Member
Joined
Jan 4, 2012
Messages
1,675
Reaction score
1,308
Points
277
Location
UK
Printer Model
Canon Pro9000 II
Yes, it does a high proportion of the things that the full blown version does, but there are some attractive exceptions. This is PSE8 print window. You can also bring up the Canon Printer Programmes from within PSE.

PSE8.png
 
Last edited:

RogerB

Print Addict
Joined
Sep 27, 2010
Messages
293
Reaction score
316
Points
183
Location
S.E. England
Printer Model
Epson Pro3880
@pharmacist,

Here are the comparisons using Delta C*ab (colour errors) (As Delta E*ab but without the L brightness component) round trips in Relative Colorimetric Intent.

Note that the vertical scale is slightly different from the previous images, unfortunately I can't control it, but they are much closer in appearance, although I think the 750 still has it. Just for interest I have edited in one of my ColorMunki basic profiles without optimisation, on the right.
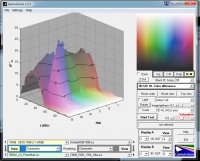
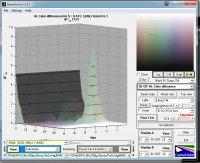
I'm not sure that these Gamutvision analyses are showing what you really want to know. By using the Round Trip view you are invoking both the AtoB and the BtoA tables. This may test the internal consistency of the profile but doesn't necessarily tell you about the accuracy of the printed output. The BtoA table determines the print accuracy and the AtoB table controls the soft-proof. Unless you actually use and rely on the soft-proof facility then the AtoB result is of no practical use to you.

In fact, the Round Trip can be somewhat misleading as an indicator of print quality. If the the Round Trip shows only small errors, but the profile gives poor print accuracy, it simply means that the soft-proof will accurately show the poor print quality. Here's an example.
Round-trip.jpg Colorimetric.jpg Soft-proof.jpg
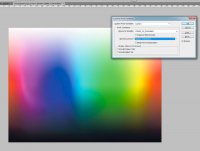
In this case the Round Trip errors are quite small but the errors in the Colorimetric view are pretty large, suggesting poor print accuracy. This is illustrated by the Photoshop soft-proof of a Grainger Rainbow where you can see odd things happening in the magenta/blue region. This corresponds nicely with the errors shown in the Gamuvision screen. This profile does indeed give rather nasty prints!
 

Emulator

Printer Master
Platinum Printer Member
Joined
Jan 4, 2012
Messages
1,675
Reaction score
1,308
Points
277
Location
UK
Printer Model
Canon Pro9000 II
Thanks for your comments in post #68.

Your round trip image in post#68 looks as though you failed to click the reset scale button, as illustrated in the first two images below.

660 without reset.png 660 with reset.png

The difference between the round trip colorimetric image and the normal colorimetric image in this specific case, is that the former highlights the reading errors and better illustrates the subject matter. The latter does not and is greatly influenced by the colour space in use. I deliberately chose the image for this reason. See images below.

Round trip 660 with errors.....Colorimetric 660 with errors
660 with reading errors round trip.png 660 with reading errors colorimetric.png

Software softproofing is not available in lower cost versions of PS, to which most of us are unfortunately limited.
 
Last edited:

RogerB

Print Addict
Joined
Sep 27, 2010
Messages
293
Reaction score
316
Points
183
Location
S.E. England
Printer Model
Epson Pro3880
Thanks for your comments in post #68.

Your round trip image in post#68 looks as though you failed to click the reset scale button, as illustrated in the first two images below.
I deliberately left the scaling the same between the two plots to make the difference easily visible. Had I reset the scale it would have looked like this. Still not much of a clue to the poor print quality.
Round-trip2.jpg

The difference between the round trip colorimetric image and the normal colorimetric image in this specific case, is that the former highlights the reading errors and better illustrates the subject matter. The latter does not and is greatly influenced by the colour space in use. I deliberately chose the image for this reason. See images below.
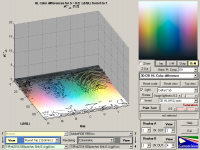
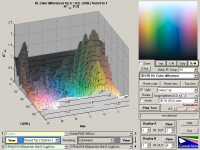
I'm not saying that the Round Trip isn't useful, just that it doesn't tell you everything about print quality. If the R-T shows errors you can never be sure whether the errors are in the BtoA or AtoB tables of the profile. Using your original profile, if you look in different regions you get different correlations between the R-T and colorimetric. Like this for instance.
Round-trip3.jpg Colorimetric-2.jpg
There appears to be an anomaly in this region that doesn't really show up in the R-T analysis, but does show up in the straight colorimetric view and in the simulation of the Output. As for the dependence on colour space, yes, if you change the colour space you change the Lab values of the input so you would expect the result to change. However, the change is pretty small in the low chroma regions like the above.
 
Top