- Joined
- Jan 18, 2010
- Messages
- 15,914
- Reaction score
- 8,921
- Points
- 453
- Location
- Residing in Wicklow Ireland
- Printer Model
- Canon/3D, CR-10, CR-10S, KP-3
After what seemed like eternity I’m back in the saddle again..
I’ve got my KP3 up and running after receiving a cable loom and plug attachment from the Kingroon Tech support team, it was very messy refitting the new cables in because there was not much room to play with, plus the connectors were loose on the main board too. (Slightly dodgy)
It was a bit of bitch getting everything back together again, but once that was done she powered up like nothing had ever happened.
In my haste to do a test print, I didn’t reset the hot-bed height again and gorged the rubber base plate a bit and had to do a hasty adjustment on the fly, but it finished the test print and everything seemed ok.. SO
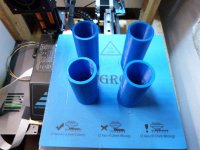
The first print for my standard lamp went without a hitch and I have done four little pieces and so far she’s working perfectly, mind you I taught I’m be a bit green to start with and make a balls of everything until I got my head in gear again, but not so..
This is the new electrical box that will fit inside the new lamp because of reconstruction and upgraded parts the old one wouldn’t fit, the cover lid was printing just as I am posting this.. I did the box in a gold colour this time….

This is the very first piece...
I’ve got my KP3 up and running after receiving a cable loom and plug attachment from the Kingroon Tech support team, it was very messy refitting the new cables in because there was not much room to play with, plus the connectors were loose on the main board too. (Slightly dodgy)
It was a bit of bitch getting everything back together again, but once that was done she powered up like nothing had ever happened.
In my haste to do a test print, I didn’t reset the hot-bed height again and gorged the rubber base plate a bit and had to do a hasty adjustment on the fly, but it finished the test print and everything seemed ok.. SO
The first print for my standard lamp went without a hitch and I have done four little pieces and so far she’s working perfectly, mind you I taught I’m be a bit green to start with and make a balls of everything until I got my head in gear again, but not so..
This is the new electrical box that will fit inside the new lamp because of reconstruction and upgraded parts the old one wouldn’t fit, the cover lid was printing just as I am posting this.. I did the box in a gold colour this time….
This is the very first piece...


