- Joined
- Jan 18, 2010
- Messages
- 16,121
- Reaction score
- 9,077
- Points
- 453
- Location
- Residing in Wicklow Ireland
- Printer Model
- Canon/3D, CR-10, CR-10S, KP-3
To Refill the PGI-29 ink Cartridge correctly you need to start off properly with the right equipment using the right procedure and lots of Patients and common sense.
I’ll break the refilling instructions in two parts the first part will be the refilling procedure itself and the second part will be some of the necessary equipment needed to complete the job safely and successful.
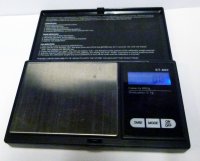
To start with you have to weigh the cartridge first to know exactly how much ink that will be needed to bring the cartridge back to a safe working level.
 Click all Photos to enlarge
These Cartridges when empty weigh in at 43.5 grams, and when full the cartridge then should weigh no more than 86 gram + / - a gram, so 43 ml of ink will fill a cartridge full.
To start filling first stand the cartridge on its label with the outlet facing up and you now are ready to begin the refill procedure, did you remember to weight it first !
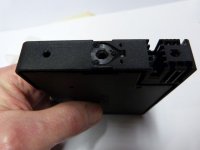
Next is to fill a syringe with the correct amount of ink that you have calculated previously and then screw the refill plastic tip onto the syringe.

Now insert the syringe into the cartridge outlet and push down until the refill tip fits snugly into the outlet port, you must keep the syringe firmly pressed into the outlet during the refilling to hold down the spring valve inside.
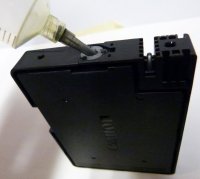 Empty Syringe used for Demo plus there's a missing Photo here **
Then pull back on the plunger slightly to create a small vacuum, now you’re ready to start refilling.
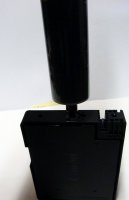
Next push down gently on the plunger nice and slowly till all of the ink has gone into the cartridge.
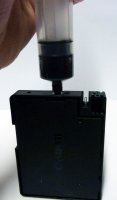
Now if any resistance is felt on the plunger just stop pushing and pull back on the plunger just a little bit and then proceed to push till the syringe is empty. (Repeat if necessary)
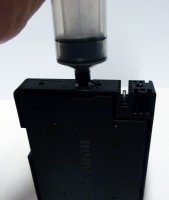
When finished injecting the ink allow the plunger to rise up a little by itself just to naturalise any pressure that might have built up during the refilling process.
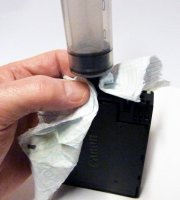
In fact pull it up yourself till you get just a drop of ink coming back into the syringe and stop then wrap a small piece of paper towel around the refilling tip as you twist the syringe to lift it out of the outlet, it may dribble a small bit or it may not.
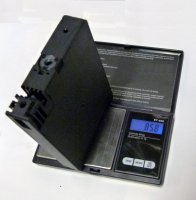
Weight the cartridge once more to check that you put sufficient ink in to it, you should try for a weight of no less > 84 gram and more < 87 gram, once that’s achieved then you can safely use the cartridge in your printer.
One further thing to note here is you’ll have to make some provisions for replacing the on board chip because running this printer with the ink monitoring disabled is not recommended because of the unnecessary excessive cleaning that this printer will do.
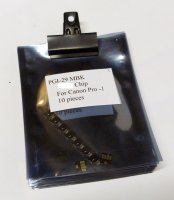
This is the same procedure that I’ve used to fill more than 200 cartridges plus (I’ve lost count now) and it works for me, so it will work for you also and if you can find a much better way than this or improve on it in any way then I hope you will share your new ideas with us also.
Happy Refilling..
Part two of these instructions will deal with the necessary tools and extras you’re going to need if you wish to refill these cartridges properly.
** I'll put the missing photo in part two because I have exceeded the amount of photos that I’m allowed in this thread.
Here's part two...
http://www.printerknowledge.com/threads/revised-refill-for-pro-1-cartridge-with-photos-part-2.8670/
I’ll break the refilling instructions in two parts the first part will be the refilling procedure itself and the second part will be some of the necessary equipment needed to complete the job safely and successful.
To start with you have to weigh the cartridge first to know exactly how much ink that will be needed to bring the cartridge back to a safe working level.
 Click all Photos to enlarge
These Cartridges when empty weigh in at 43.5 grams, and when full the cartridge then should weigh no more than 86 gram + / - a gram, so 43 ml of ink will fill a cartridge full.
To start filling first stand the cartridge on its label with the outlet facing up and you now are ready to begin the refill procedure, did you remember to weight it first !

Next is to fill a syringe with the correct amount of ink that you have calculated previously and then screw the refill plastic tip onto the syringe.
Now insert the syringe into the cartridge outlet and push down until the refill tip fits snugly into the outlet port, you must keep the syringe firmly pressed into the outlet during the refilling to hold down the spring valve inside.
 Empty Syringe used for Demo plus there's a missing Photo here **
Then pull back on the plunger slightly to create a small vacuum, now you’re ready to start refilling.

Next push down gently on the plunger nice and slowly till all of the ink has gone into the cartridge.

Now if any resistance is felt on the plunger just stop pushing and pull back on the plunger just a little bit and then proceed to push till the syringe is empty. (Repeat if necessary)

When finished injecting the ink allow the plunger to rise up a little by itself just to naturalise any pressure that might have built up during the refilling process.
In fact pull it up yourself till you get just a drop of ink coming back into the syringe and stop then wrap a small piece of paper towel around the refilling tip as you twist the syringe to lift it out of the outlet, it may dribble a small bit or it may not.

Weight the cartridge once more to check that you put sufficient ink in to it, you should try for a weight of no less > 84 gram and more < 87 gram, once that’s achieved then you can safely use the cartridge in your printer.

One further thing to note here is you’ll have to make some provisions for replacing the on board chip because running this printer with the ink monitoring disabled is not recommended because of the unnecessary excessive cleaning that this printer will do.

This is the same procedure that I’ve used to fill more than 200 cartridges plus (I’ve lost count now) and it works for me, so it will work for you also and if you can find a much better way than this or improve on it in any way then I hope you will share your new ideas with us also.
Happy Refilling..
Part two of these instructions will deal with the necessary tools and extras you’re going to need if you wish to refill these cartridges properly.
** I'll put the missing photo in part two because I have exceeded the amount of photos that I’m allowed in this thread.
Here's part two...
http://www.printerknowledge.com/threads/revised-refill-for-pro-1-cartridge-with-photos-part-2.8670/


