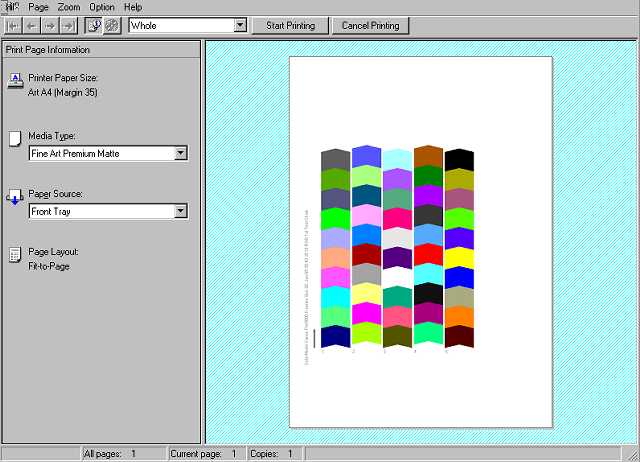
I believe that the first chart is a bitmap but without any embedded color space. No embedded profile in other words. They have very carefully covered the set of 50 values. these values if you could interpolate between them, theoretically would cover a pretty large gamut.
The printer will attempt to reproduce those 50 values as accurately as possible. Because you only choose paper type and quality, and turn off color management, the 50 patch print will be printer without any interference from the printer driver.
Now you scan these patches and the colormunki with record the actual values the printer produced. Now this is where I am not entirely sure what happens but I think a comparison is made between the original values and the printed ones. The software now generates a compensatory chart that supposedly tells it how to compensate for the errors per patch.
OR..... the SW is generating a second set of colors having nothing to do with the 1st one. Thus having 100 total patches to print and analyze.
Regardless of what is actually happening, in practice, which is what really matters, I have found that the CM produces excellent ICM profiles that at least for me and my printer Army with multiple papers and inks.
Since I am always thinking out of the box and basically I rely on my general lack of real knowledge in the engineering side of these calibrators, I took the plunge and decided to run and optimization of one of my CM profiles.
Now as I understand the option, you are supposed to load an image you are intending to print, with your just created in order to create a custom tweaked profile JUST for the values that that image files contains.
I thought, why not run an optimization, but load a 1200 patch tif file. Well I did that and the CM generated a third 50 patch print which after drying I scanned. The new profile was same with the same name but I added "Optimized" to it. That way I did not overwrite the original.
Now for the proof in the pudding.
I printed 2 sets of prints from one color Adobe RGB file and the same but converted to Gray scale.
First color and B&W set was printed using the 1st profile ( not optimized )
The color print was great. The B&W was also great BUT a bit on the warm side but still lovely. No one would complain.
Second color and B&W set was printed using the 2nd profile ( optimized )
The color print was also great. The B&W though, was dead on neutral.
By the way I had overlaid a Black to White 20 step wedge on both files to make sure I was able to discern each and ever step between the deepest and the next to white.
Both profiles were able to print all the steps.
So whether what I did was supposed to work or not, I can not argue with the results.
Oh by the way, I did this on the R2000. Yes folks, a single black printer. I originally did it of my R3800 which absolutely needs custom profiles due to the fact that I using OCP K3 + OEM Magenta ( extracted from 220 ml large format carts from Ebay ) hybrid ink set. Advance Black and White absolutely will not print a neutral print. So that is why I did this, though I was almost 100% that it would not work.
The process is simple and quick and I can't imagine not having a colormunki.
Joe