Banding on parts of my photo prints

Ink stained Fingers

Printer VIP
Platinum Printer Member
Joined
Dec 27, 2014
Messages
6,058
Reaction score
7,230
Points
363
Location
Germany
Printer Model
L805, WF2010, ET8550
the banding is quite well visible, mainly in cyan and magenta, and with traces as well in yellow. fast_dark 1.jpg

And I'm irritated that this does not show up in the nozzle check.

I have seen dust buildup at the little sensor, with the yellow cables, you most likely would have to remove the top cover - or part of it, a service manual would help - @PeterBJ is the most reliable source where you can find a MG6120 maint. Manual.
And I'm using Q-tips to clean the coding strip with a windows cleaner
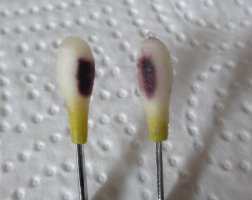
Coding strip.jpg

There is always some ink fog generated during printing, and this slowly settles everywhere - on the inside cover parts and this coding strip. Give it a try.
 

PenguinLust

Printer Guru
Joined
Jan 29, 2011
Messages
118
Reaction score
4
Points
138
Location
Canada
Printer Model
Canon PIXMA MG6120
Here is a service manual for the MG6120 printer, and here is the parts catalog. Good luck with the cleaning.
I've already done an alignment.
Ok, so I have 2 recommendations:
  1. Cleaning the timing band: is that the "Paper feed motor adjustment" that you find in the service notes at the end of the manual?
  2. I've also been told to clean some sensors but I don't see where in the manual it shows you how to get at those.
  3. Happy New Year
 

Ink stained Fingers

Printer VIP
Platinum Printer Member
Joined
Dec 27, 2014
Messages
6,058
Reaction score
7,230
Points
363
Location
Germany
Printer Model
L805, WF2010, ET8550
I've also been told to clean some sensors but
I think such advice should be a little bit more specific

I find the 'timing slit belt' - timing strip in the parts catalogue at the end at the numerical index page F1 pointing to
figure and key number Figure 9-2 on page B 17, but I can't find an image with this timing strip in place/engaged. It passes through a sensor at the rear of the printhead carriage and does not need to be removed for cleaning. Access depends how much you can open the printer with the scanner on top.
 

PeterBJ

Printer VIP
Platinum Printer Member
Joined
Nov 27, 2010
Messages
5,113
Reaction score
4,976
Points
373
Location
Copenhagen Denmark
Printer Model
Canon MP990
The timing slit belt/ timing strip can be seen in the third photo on page 26/66 in the service manual. Notice the "L" marking at the left hand side. For correct install of the belt it must read as a proper "L". Here I have marked the timing strip on the photo from the service manual:

Timing strip MG6120.jpg


The timing strip can also be seen in the parts catalog, Page B-17, Figure 9, Position 2.
 

PenguinLust

Printer Guru
Joined
Jan 29, 2011
Messages
118
Reaction score
4
Points
138
Location
Canada
Printer Model
Canon PIXMA MG6120
Ok, that part looks pretty complete. I'm going to need to be sure my ducks are in a row before I start this, because I have 2 bored cats who're going to think the pieces are cat toys I've put there just for them, so I won't be able to leave it half done.
Having said that, how about this sensor cleaning while I'm in there?
 

PeterBJ

Printer VIP
Platinum Printer Member
Joined
Nov 27, 2010
Messages
5,113
Reaction score
4,976
Points
373
Location
Copenhagen Denmark
Printer Model
Canon MP990
I think nothing is wrong with the timing strip or the timing strip optical sensor. A dirty timing strip would cause problems with determining the horizontal position of the print head, not horizontal banding See this thread and this.

A dirty timing disk as suggested by @The Hat could cause problems with line feed, but I think the problems would be white stripes, not dark as dirt on the timing disk might cause the reader to skip a marking, advancing the paper too much.

Maybe the problem is caused by the photo black nozzles? A new print head might then be needed. Some canon printers have had problems with photo black nozzles caused by aftermarket ink.

I think the the banding could also be caused by the print head or the line feed/eject being out of alignment. A manual print head alignment might be better than an automatic alignment. Good light and a magnifier are good when selecting the best patterns in the manual alignment procedure.

Line feed/eject alignment is adjusted from service mode. See the service manual page 45/66 and on. Specially notice page 49/66 about the LF/Eject alignment. I recommend Service tool v3400 for your printer.
 
Last edited:

PenguinLust

Printer Guru
Joined
Jan 29, 2011
Messages
118
Reaction score
4
Points
138
Location
Canada
Printer Model
Canon PIXMA MG6120
Ok I've gone through the instructions, and I just have a couple of questions: do I have to use A4 paper? Will US letter not be enough? Also, the automatic alignment asked that I use matte paper, but it doesn't seem to care for manual. Or is that what "media type" is? I don't know what "HR-101, GF-500/Office Planner, HP Bright White, and Canon Extra/STEINBEIS" are
 
Last edited:

Ink stained Fingers

Printer VIP
Platinum Printer Member
Joined
Dec 27, 2014
Messages
6,058
Reaction score
7,230
Points
363
Location
Germany
Printer Model
L805, WF2010, ET8550
A4 or similar should be o.k.
A matte/coated paper - inkjet paper - gives you a better line definition than fibrous normal/copy paper and should be preferred for the alignment process, but do that only as the last step.
HP Bright White etc are just brand names for various paper types, you can use other papers.
 
Top