- Joined
- Nov 3, 2004
- Messages
- 3,081
- Reaction score
- 1,452
- Points
- 337
- Location
- Bay Area CA
- Printer Model
- CR-10, i560 ,MFC-7440N
So, I'll admit it... I LOVE having a bidet on a toilet! In fact, I've purchased about 7 of these SUPER cheap ones and given them to friends and even installed them for a few people... just to spread the true gospel! Many people (myself included) swear that it's the best $25 you could spend! (and the install only takes like 10 minutes)
I mean, look at the reviews! almost 6,500 4.5 stars!!! https://amzn.to/2MxH3SI
Anyway...
The only problem I had is with one of my toilets has a seat where after adding the bidet, the seat was raised higher, and not seating against the bowl. I had too much space between the bowl and the seat
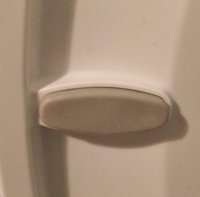
I noticed the spacer / bumper / foot on the bottom of the seat (and space between the bumper and the bowl):
I pulled off the bumper and thought "I bet I could print a spacer for this!"
... and then remembered Chuck's video where he scanned a thing and imported it into tinkercad to model from!!!
See the first few minutes here:
You can see my scan of the bottom of my spacer here:

I edited it a bit in photoshop, converted it to black/white, and imported it into tinkercad:
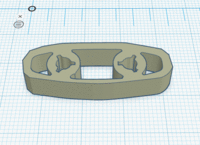
Next I designed basic shapes into this model:
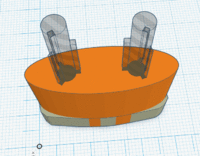
Which ended up like this:
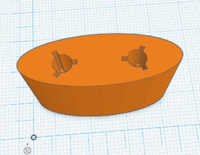
My first few iterations were going to be replacing the existing gray bumper with this plastic one... which I did, and it worked pretty well.
... but, I liked the rubberized material of the existing bumper, so I took the shapes I used to create the holes, duplicated them, and made them "shapes", which ended up like this:
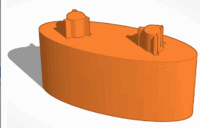
After a bunch of testing, tweaking, etc. (as seen below)...
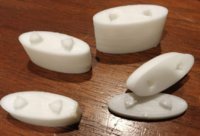
... I ended up with perfection!!!
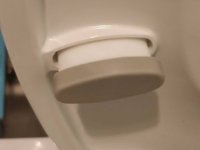
This was a very satisfying project!

I mean, look at the reviews! almost 6,500 4.5 stars!!! https://amzn.to/2MxH3SI
Anyway...
The only problem I had is with one of my toilets has a seat where after adding the bidet, the seat was raised higher, and not seating against the bowl. I had too much space between the bowl and the seat
I noticed the spacer / bumper / foot on the bottom of the seat (and space between the bumper and the bowl):

I pulled off the bumper and thought "I bet I could print a spacer for this!"
... and then remembered Chuck's video where he scanned a thing and imported it into tinkercad to model from!!!
See the first few minutes here:
You can see my scan of the bottom of my spacer here:

I edited it a bit in photoshop, converted it to black/white, and imported it into tinkercad:

Next I designed basic shapes into this model:

Which ended up like this:

My first few iterations were going to be replacing the existing gray bumper with this plastic one... which I did, and it worked pretty well.
... but, I liked the rubberized material of the existing bumper, so I took the shapes I used to create the holes, duplicated them, and made them "shapes", which ended up like this:

After a bunch of testing, tweaking, etc. (as seen below)...

... I ended up with perfection!!!

This was a very satisfying project!
Last edited:


