Making a B&W ink set for 6-color Epson printers

pharmacist

Printer VIP
Platinum Printer Member
Joined
May 29, 2007
Messages
2,643
Reaction score
1,403
Points
313
Location
Ghent, Belgium
Printer Model
2x SC-900, WF-7840, TS705
Hi Martin,

I think it is due to the Inkowl profile. I have optimized that profile and normally the result are pretty good and quite neutral, but I think due to the dark area's so much ink has be laid down to get the right tone, causing clipping.

You will need a very sensitive scale to to weight up to 0,01 gram to get it really right. Yes ABW K6 ink set has been calculated by me.

Again: QTR is necessary to pull out the full potential of this ink set, but as you can see: even without it the results are really good indeed :).
 

mikling

Printer VIP
Platinum Printer Member
Joined
Jul 2, 2006
Messages
3,239
Reaction score
1,472
Points
313
Location
Toronto, Canada
Carbon inksets are easy to create and should not be that expensive. They are simple inksets... made of matte black ink made up of pure carbon and the one Roark originally used was the IS WJ1082. Carbon printing is special as it always give a warm tone and THE MOST ARCHIVAL. All particles are carbon just like the first caveman scribbling on the wall with coals. When I released my Canon grey inkset, I was about to release a Karbon inkset for Epsons Claria series. The recipes that Roark listed from years ago originated from the R200 days maybe it has changed. The crossover point with the newer Claria based machines are slightly different but correctable with QTR.
You can get the gist of what crossover points are about on Norman Koren's site.
 

Łukasz

Printer Guru
Joined
Jul 3, 2014
Messages
250
Reaction score
393
Points
138
Location
Poland
Printer Model
MG6250 (MG5150 before)
Hello,

I do not want to put a stick in the anthill, but I would like to ask, why not replace one chromatic color (eg M and LM) with black (respectively K and LK) and print it as a chromatic image?

I did something similar in Pixma MG5150 - replaced the ink cartridges M with BK (chip has been replaced).
In addition, I had to:
- Turn off ICC in printer (and in printing software)
- Convert a grayscale image to chromatic, black point has been shifted to rbg(100%,100%,0)

The initial result was pretty good, but with a densitometer (or colorimeter / spectrophotometer) it can be linearized and will be even better.

Ł.
 

martin0reg

Printer Master
Joined
May 9, 2010
Messages
1,060
Reaction score
748
Points
273
Location
Germany Ruhrgebiet
Lukasz,
to understand it right:
- the mg5150 has 4 color carts "cli" including "photo black" (C-M-Y-K) and the text black "pgi".
- you change the color set from "C-M-Y-K" to "C-K-Y-K" by putting a second cartridge with photo black ink on the M position (with M chip)...right?
- turn of ICC in printer: with my mp810 this would mean "color correction: (driver-ICM-none) = none"

The very last point I do not understand:
"Convert a grayscale image to chromatic, black point has been shifted to rbg(100%,100%,0)"....??
What about the remaining Y and C in the printer...how do you let the printer use only the two black carts..confused...and why replace the M postion, not the C ...or both...
 

The Hat

Printer VIP
Platinum Printer Member
Joined
Jan 18, 2010
Messages
15,790
Reaction score
8,822
Points
453
Location
Residing in Wicklow Ireland
Printer Model
Canon/3D, CR-10, CR-10S, KP-3
@pharmacist these two pictures you produced are really stunning and for me you have reached the Holy Grail here, your ink and paper combination really show up the detail exceptionally well.

I reckon you’ve achieved far better results than Paul Roach did by using both ends of the stepwedge to its maximum; your pictures are so much brighter and livelier.
Thanks for sharing your Pictures but more so your detailed results, have a Guinness on me.. :woot
 

pharmacist

Printer VIP
Platinum Printer Member
Joined
May 29, 2007
Messages
2,643
Reaction score
1,403
Points
313
Location
Ghent, Belgium
Printer Model
2x SC-900, WF-7840, TS705
@pharmacist these two pictures you produced are really stunning and for me you have reached the Holy Grail here, your ink and paper combination really show up the detail exceptionally well.

I reckon you’ve achieved far better results than Paul Roach did by using both ends of the stepwedge to its maximum; your pictures are so much brighter and livelier.
Thanks for sharing your Pictures but more so your detailed results, have a Guinness on me.. :woot

Well: I was positively surprised myself but the results. I compared the results with my Epson Pro 3880 using the ABW-mode and still the images are better in details in the shadows using my home-brewed K6 ink set. I will keep this ink set in my tupperware box and use it when I need to print archival B&W portraits. I think chinese ink reproductions (landscapes with fine details) are a good subject to be printed using this ink set :).
 

Łukasz

Printer Guru
Joined
Jul 3, 2014
Messages
250
Reaction score
393
Points
138
Location
Poland
Printer Model
MG6250 (MG5150 before)
martin0reg,
- the mg5150 has 4 color carts "cli" including "photo black" (C-M-Y-K) and the text black "pgi".
- you change the color set from "C-M-Y-K" to "C-K-Y-K" by putting a second cartridge with photo black ink on the M position (with M chip)...right?
- turn of ICC in printer: with my mp810 this would mean "color correction: (driver-ICM-none) = none"
3 x Yes :thumbsup

Turning off ICC (or other CMS) allow for direct mapping of "computer" (additive) colors (red, green, blue) to "printing" (subtractive) colors (C, M, Y).

For our purpose it is essential to know direct mapping of CMY colors:
  • 100% Magenta is made from rgb(100%,0%,100%)
  • 100% Cyan is made from rgb(0%,100%,100%)
  • 100% Yellow is made from rgb(100%,100%,0%)
  • Background is made form rgb(100%,100%,100%)
In unmodified ink system it allow for printing with sole ink, eg. I want to test Magenta for starving and I draw entire sheet of paper with rgb(100%,0%,100%) (usual name: "Fuchsia"). And after disabling ICC/CMS in printer driver, entire page will be printed with Magenta ink (and only with Magenta).

Halftones are made as follow:
  • N% Magenta is made from rgb(100%,100% - N%,100%)
Eg: If I want 33% Magenta I have to draw it with rgb(100%,67%,100%).

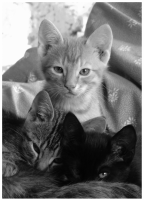
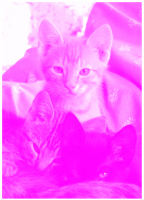
Some examples maybe, grayscale image and it chromatic counterpart intended to be printed with BK ink from M ink tank slot:
PICT0008gs_b.png PICT0008m_b.png

And transformation made with IrfanView "Shift+G" command
(please note R and B values set to "255" instead of "0"):
irfanview_color_corrections_dialog.png


What about the remaining Y and C in the printer...how do you let the printer use only the two black carts..confused...and why replace the M postion, not the C ...or both...
I left rest of carts in their places. Nozzle print looks like this:
grayscale_photprint_mg5150-jpg.1455

Replacing C with BK will act same, but black point have to be shifted to rgb(0%,100%,100%) (usual name: "Aqua"). In most photo printers C and M are optimized to deliver superior halftones.
Replacing both C and M is possible (black point have to be shifted then to rgb(0%,0%,100%) ), but overall image will be to dark. This is because each of CMY colorants blocks 1/3 of spectrum. If BK is used instead any of CMY colorants, entire spectrum is blocked. If both C and M are set with BK, entire spectrum is blocked twice, leading to darkening midtones.
MG5150 is dye CMYK with "UCR like" CMY-to-BK replacement. Replacement is engaged when every of CMY colorants reaches ~60%. Chromatic colors are not affected with "UCR like" replacement.

This method may be considered as poor man's B&W printing, but it also allow to use partially damaged printheads (some non-critical electronics failures or particular color clogged).

Ł.
 

pharmacist

Printer VIP
Platinum Printer Member
Joined
May 29, 2007
Messages
2,643
Reaction score
1,403
Points
313
Location
Ghent, Belgium
Printer Model
2x SC-900, WF-7840, TS705
Hi Lukasz,

Your method sounds very good indeed. Most Canon printers do have 3 sets of nozzle sizes for C, M and G: 1, 3 and 5 pl and 5 pl for Y and K. I think this could be achieved as well on Epson Claria based printers, as the droplet size can vary from 1.5 via 3, 7, 14 and 21 pl per nozzle and this per color channel. Actually with a RIP, one could drive an Epson 1400 into an Cyan, Magenta, Yellow, Matte Black, Photo Black and Grey printing machine without the light colors installed. Printing however will be slower as more head passes are necessary to create a fine pattern of the smallest droplets to mimick printing with light colors. With 8 color printers like the Epson R2880 one could create a Matte Black, Photo Black, Grey, Cyan, Magenta, Orange, Yellow and Gloss Optimizer printing machine.

The R2000 would be great if the Magenta, Orange and Red inks would be replaced by Vivid Magenta, Orange and Grey ink. Grey ink does gives finer details in shadows and will produce neutral ABW prints and also gives depth in color printing as well. This way you will have the best of both worlds: R3000 with ABW and R2000 with vivid and bright reds and Gloss optimizer, both blacks loaded (no need to flush a single black channel as in the R3000) and Gloss optimizer to give a uniform gloss over pigment ink prints.
 

martin0reg

Printer Master
Joined
May 9, 2010
Messages
1,060
Reaction score
748
Points
273
Location
Germany Ruhrgebiet
My goodness..for this modification you must calculate with different interacting "chromatic circles"
I don't know if I will succed here as it is totally new for me... will try it with an ip4000 which I could reanimate.
Anyway your approach of
"direct mapping of "computer" (additive) colors (red, green, blue) to "printing" (subtractive) colors (C, M, Y)..."
without a special RIP sounds very interesting!


[edit: just to be sure, two questions:]
In your first post you wrote:
"Convert a grayscale image to chromatic, black point has been shifted to rbg(100%,100%,0)"
...this would be in the correct order:
- rgb(100,0,100)...and it means magenta only printing, right?

In your detailed instruction, which helps a lot, you wrote:
"And transformation made with IrfanView "Shift+G" command
(please note R and B values set to "255" instead of "0")..."
...I think it should say: "255" instead of "100", right?


Now with black ink in the magenta channel (which I have not put in yet) - is the following the complete modification I have to do with the original photo:
1 convert to B&W (desaturate or B&W filter) then convert to grayscale
.. or just convert to grayscale..?..in this case no B&W filters possible?
2 set colour to 255-0-255
..if (2) is actually possible with a grayscale image...
I am struggling with my editors...no irfanview here, no adobe too...with faststone it seems to work out..
 
Last edited:

Łukasz

Printer Guru
Joined
Jul 3, 2014
Messages
250
Reaction score
393
Points
138
Location
Poland
Printer Model
MG6250 (MG5150 before)
My goodness..for this modification you must calculate with different interacting "chromatic circles"
I don't know if I will succed here as it is totally new for me... will try it with an ip4000 which I could reanimate.
Anyway your approach of
"direct mapping of "computer" (additive) colors (red, green, blue) to "printing" (subtractive) colors (C, M, Y)..."
without a special RIP sounds very interesting!
Direct RGB to CMY is default color mapping for most cheaper printers, regardless of ink system setup (eg. CMYK or ClcMlmYK).
Entire CMS (Windows) looks like this:
  1. Windows/printing program wraps image colorspace to match printer RGB input. It's made with ICC or other CMS supplied with printer.
  2. Printer driver converts RGB to CMY directly (very fast linear conversion).
  3. Printer driver converts CMY to match ink system output:
    • inks used for certain media and additional colorspace conversion: eg. CMY to CMYK, CMY to ClcMlmYK
    • proper tone reproduction curve per every ink used
    • printhead movement and nozzles firing algorithm settings
In Pixma printers 1. is made by software (OS/printing program/driver) and by default controlled by printer driver, 2. is fixed because of RGB input of printer driver (please look into .icm profiles from printer driver), 3. Dependant on driver settings (media, quality, etc.).

[edit: just to be sure, two questions:]
In your first post you wrote:
"Convert a grayscale image to chromatic, black point has been shifted to rbg(100%,100%,0)"
...this would be in the correct order:
- rgb(100,0,100)...and it means magenta only printing, right?
Yes, it is magenta only printing. Please note, that rgb(100%,0,100%) is not same as rgb(100,0,100). "%" is important. By default, rgb(100,0,100) is equivalent to rgb(39%,0,39%) - in 24 bit RBG encoding, and rgb(255,0,255) is referring to Fuchsia.

In your detailed instruction, which helps a lot, you wrote:
"And transformation made with IrfanView "Shift+G" command
(please note R and B values set to "255" instead of "0")..."
...I think it should say: "255" instead of "100", right?
Picture will answer best :)
irfanview_gs_to_m_convert.gif


Now with black ink in the magenta channel (which I have not put in yet) - is the following the complete modification I have to do with the original photo:
1 convert to B&W (desaturate or B&W filter) then convert to grayscale
.. or just convert to grayscale..?..in this case no B&W filters possible?
Whatever gives better control and better visual effect.
Preferring RGB over grayscale is probably safer due to some gamma concerns (in some cases grayscale image can loose proper gamma value, in RGB is still same gamma value).
2 set colour to 255-0-255
..if (2) is actually possible with a grayscale image...
I am struggling with my editors...no irfanview here, no adobe too...with faststone it seems to work out..
Some programs automatically convert gs to rgb, some remap gs to 256 levels magenta scale, which can be handled by .png (but gamma concerns).

FastStone (ver. 5.1) "Ctrl+E" command has similar dialog window to IrfanView "Shift+G" (works same).

Ł.
 

Latest posts

Top