- Joined
- Nov 27, 2010
- Messages
- 5,130
- Reaction score
- 5,012
- Points
- 373
- Location
- Copenhagen Denmark
- Printer Model
- Canon MP990
Here it is!
This tool provides service mode operations for several Canon printers of the PGI-x20/CLI-x21, PGI-x25/CLI-x26 and PGI-9 generations.
Here is a list of supported printers, from the Russian download site:
iP2700; iP3600; iP4600; iP4700; ip4840; ip4850;
PRO9000; PRO9500;
IX7000;
MP240; MP250; MP260; MP270; MP280; MP480; MP490; MP540; MP550; MP560; MP620; MP630; MP640; MP980; MP990;
MX320; MX330; MX860;
MG5140; MG5150
I've tested the tool with a Canon MP540 and Win Vista Home Premium 32 bit. I guess It will also work with Win XP and 7 and maybe 64 bit versions of the OS's (Not tested). Neither AVG Internet Security nor MBAM (Malwarebytes Antimalware) found any threats in the download.
For download links see "Updates" at the bottom of this post.
Instructions for use: First the printer must enter service mode. No other printers should be connected to the computer. This is procedure for my MP 540, from the service manual, the procedure for your printer might be different:
i. With the machine power turned off, while pressing the Stop button, press and hold the ON
button. (DO NOT release the buttons).
ii. When the Power LED lights in green, while holding the ON button, release the Stop button.
(DO NOT release the ON button.)
iii. While holding the ON button, press the Stop button 2 times, and then release both the ON
and Stop buttons. (Each time the Stop button is pressed, the Alarm and Power LEDs light
alternately, Alarm in orange and Power in green, starting with Alarm LED.)
iv. When the Power LED lights in green, the machine is ready for the service mode operation.
The LCD display now shows two lines of text: 1: Service mode and 2: Idle.
Before starting the service tool, make sure that both cassette and rear tray contains paper, else service mode operations might fail, as you cannot predict which paper source the printer will use.
Now now run the unpacked ServiceTool_V2000.exe file. No installation necessary.
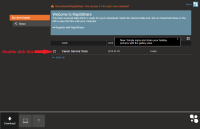
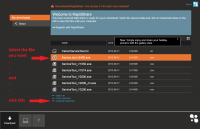
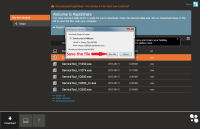
You now see this window with two tabs. Click thumbs to enlarge
 and
and 
I've tried only the "Test Print" and "EEPROM" buttons on the "Main" tab. You can change several settings with the program, but unless absolutely necessary don't try other operations , especially if you don't have the service manual. You might delete info or change vital settings. I've made such mistakes my self, therefore this warning. Link here: http://www.nifty-stuff.com/forum/viewtopic.php?pid=49752#p49752
Click the "test print" on main tab and the the text is greyed out. Now wait for the familiar style test print with extended nozzle check etc. Don't panic even if it seems to take forever.. You will eventually get the printout and this pop-up window: Click the thumbs to enlarge, and click the enlarged cropped image again to expand to full size.
 and cropped for less JPG-compression:
  and the pop-up:
It is seen from the cropped image, that this printer has a problem with the printhead.
You may now proceed with service mode operations. Click the "EEPROM" button on the main tab. This produces the EEPROM info printout, you also get the option to choose paper source for this printout. This operation also takes long time to finish. Click the thumbs to enlarge:
 and the pop-ups
  and
and 
Exit service mode by turning the printer off using the printer's Power On/Off button, and close the Service tool application.
Note: The service tools only work with a USB connection, so you will have to use a USB cable with a wireless printer. Also note that all versions work with 32 bit Windows but only versions 3200 and 3400 also work with 64 bit Windows.
Update Jan 7 2025: This post has the service tool v3400 attached as a .rar archive
Older updates were removed as the links no longer work.
This tool provides service mode operations for several Canon printers of the PGI-x20/CLI-x21, PGI-x25/CLI-x26 and PGI-9 generations.
Here is a list of supported printers, from the Russian download site:
iP2700; iP3600; iP4600; iP4700; ip4840; ip4850;
PRO9000; PRO9500;
IX7000;
MP240; MP250; MP260; MP270; MP280; MP480; MP490; MP540; MP550; MP560; MP620; MP630; MP640; MP980; MP990;
MX320; MX330; MX860;
MG5140; MG5150
I've tested the tool with a Canon MP540 and Win Vista Home Premium 32 bit. I guess It will also work with Win XP and 7 and maybe 64 bit versions of the OS's (Not tested). Neither AVG Internet Security nor MBAM (Malwarebytes Antimalware) found any threats in the download.
For download links see "Updates" at the bottom of this post.
Instructions for use: First the printer must enter service mode. No other printers should be connected to the computer. This is procedure for my MP 540, from the service manual, the procedure for your printer might be different:
i. With the machine power turned off, while pressing the Stop button, press and hold the ON
button. (DO NOT release the buttons).
ii. When the Power LED lights in green, while holding the ON button, release the Stop button.
(DO NOT release the ON button.)
iii. While holding the ON button, press the Stop button 2 times, and then release both the ON
and Stop buttons. (Each time the Stop button is pressed, the Alarm and Power LEDs light
alternately, Alarm in orange and Power in green, starting with Alarm LED.)
iv. When the Power LED lights in green, the machine is ready for the service mode operation.
The LCD display now shows two lines of text: 1: Service mode and 2: Idle.
Before starting the service tool, make sure that both cassette and rear tray contains paper, else service mode operations might fail, as you cannot predict which paper source the printer will use.
Now now run the unpacked ServiceTool_V2000.exe file. No installation necessary.
You now see this window with two tabs. Click thumbs to enlarge
 and
and 
I've tried only the "Test Print" and "EEPROM" buttons on the "Main" tab. You can change several settings with the program, but unless absolutely necessary don't try other operations , especially if you don't have the service manual. You might delete info or change vital settings. I've made such mistakes my self, therefore this warning. Link here: http://www.nifty-stuff.com/forum/viewtopic.php?pid=49752#p49752
Click the "test print" on main tab and the the text is greyed out. Now wait for the familiar style test print with extended nozzle check etc. Don't panic even if it seems to take forever.. You will eventually get the printout and this pop-up window: Click the thumbs to enlarge, and click the enlarged cropped image again to expand to full size.
 and cropped for less JPG-compression:
  and the pop-up:
It is seen from the cropped image, that this printer has a problem with the printhead.
You may now proceed with service mode operations. Click the "EEPROM" button on the main tab. This produces the EEPROM info printout, you also get the option to choose paper source for this printout. This operation also takes long time to finish. Click the thumbs to enlarge:
 and the pop-ups
  and
and 
Exit service mode by turning the printer off using the printer's Power On/Off button, and close the Service tool application.
Note: The service tools only work with a USB connection, so you will have to use a USB cable with a wireless printer. Also note that all versions work with 32 bit Windows but only versions 3200 and 3400 also work with 64 bit Windows.
Update Jan 7 2025: This post has the service tool v3400 attached as a .rar archive
Older updates were removed as the links no longer work.
Last edited:


